Category Archives: Projects

Mushrooms and elephants and more mushrooms… oh my…

Mood: BORED!
Listening to: Not by choice, the world thingie in Berlin… appearently it’s interesting to watch… *shrugs*

So yeah…
I’ve been busy. And bored… Even with Goliath bringing me many movies, I have been diligent and watched them all. So, I’ve been watching old Dr. Who episodes with commentary. It’s really interesting, actually. But, while listening to them, I’ve been sowing. You already know I made a hedgehog, and I was planing on making another hedgehog, but I decided I’d make something else. And since the felt was gray, I went with elephant.

Introducing: Retardaphant
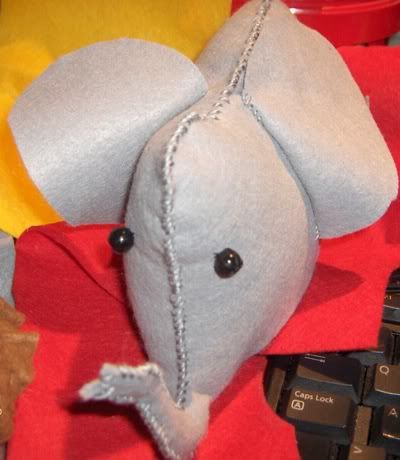
As you can understand, I’m not happy with it. It has a nasty bump on its head… and it’s REALLY streamlines… I think it must be something like a Duphant or a Elegong… (Elephant/Dugong)

Just in case you were wondering… this is a Dugong… Probably related to the Manatee… unless they are the same animal… who cares?

But they are cute… And they are basically the same… the Dugong is smaller than the Manatee…
But I digress…
I basically did what I did with the hedgehog… sowed along the edge, cut it to shape and stuffed it…

I also made mushrooms…
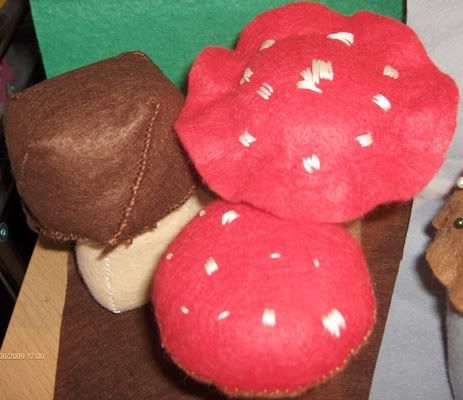
I made the small one first, the one in front. I cut the stalk by eye… who needs mesurements?
then I made a circle for the buttom and the top. The same colour for the stalk as the bottum half, and for the top I just sowed tiny dots with white thread.
Same with the larger Amanita… the only difference is that the larger red part is glues on….
The brown one was more fun… I can’t remember what I did, but I did it and I’m really happy with it..
Kinda looks like a button mushroom.. ^_^

And while I was getting more felt for the mushrooms, I got more pins to put in my hedgehog pincusion…
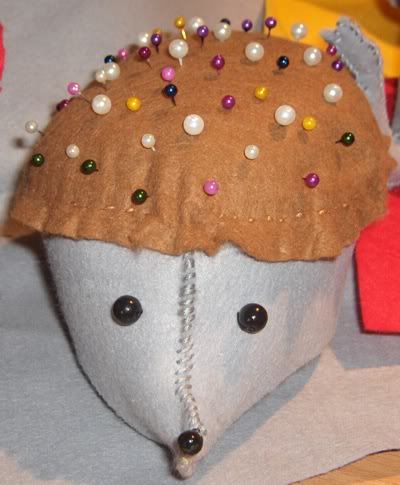
Looks loads better XD

Lene

The Hedgehogs

Mood: Gooood…
Listening to: Barenaked Ladies – Big Bang Theory theme song… did I mention I’m hooked?

Yes, I’m making hedgehogs… like.. to put needles in when you sow…
I’m using felt… gray, light brown and brown… black beads for eyes and tiny black bead for nose. And some foam rubber for the base and under the top so the needles stay… I don’t know if I’ll use it under the top yet. I bought it just in case, really. I’ll have to figure out how dense the hedgehog will be when I start stuffing it.

I started up by cutting the gray foam rubber thing into egg like shapes… kinda… like free handed…
and then I started messing things up and cut the felt free handed into one long wide strip for the body of the hedgehog.
I haven’t sown it together yet because, seeing as I think I have messed up, I need to think on how to do his nose.
I think I know how to do it, but I need to wait for the glue to dry. I used a universal glue.. I could have used a fabric glue, but I don’t have that, and the wood glue was glues shut and I couldn’t open it, so the only other glue I could use was universal.
So… now I’m waiting for the glue to dry. I’ll update when I get pictures and going again on the fabrication of the animal.

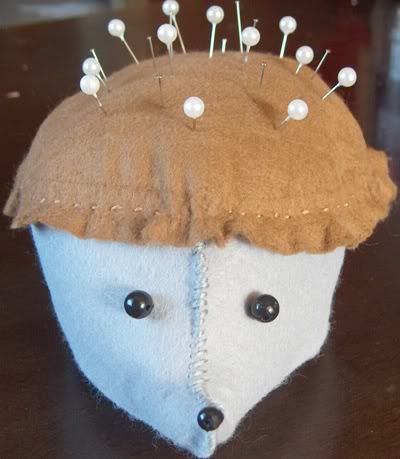
This is how the hedgehog, the first one, turned out. Even thought I fucked up, I am very happy with him… her… it…
I haven’t stared on the other one yet, but I will… Thinking about maybe making it a little smaller…
But for now it’s ok. I have, at least, one hedgehog…  Go me…

Oh right…
First I glued the foam rubber thing to the felt and waited for it to dry. Then I started sowing the nose… and when I figured out “That will never look like a hedgehog like that” I cut it to shape. Then I attached the eyes and nose.
After that I cut out the brown felt. I wanted it round, and it got round, and a little small. Trying very hard to make the round shape fit a not round shape I struggled quite a bit. But then I remembered something my mother did when I visited her, when we were making throw pillows for her couch. We made a long round one.. like cylindrical shaped, and the end pieces were so hard to fit. So she used the showing mashine and sowed a single, far spaced line around and then another, slighly on the inside of that… she held the under thread fast, and started to pull on the top line, and the fabric started to scrunchy up. That’s what I did with my hedgie. But of course you should use a BROWN THREAD!!! which I didn’t do. I used white, and I had to removed them afterwards, and it looks kinda corney now.
But yeah… not too bad for my first time. And I can only get better, right?

Doctor Who scarf

Mood: Pretty good… I feel like I’ve accomplished something today… We painted one wall of the garage…
Listening to: Dango Daikazoku

So yeah…
A new project.  I have long said that I would knit a Doctor Who scarf, and finally I’ve started. You’ll find the original recipe for which one I want to make here.  Of course I couldn’t find the right yarn, or the right colours, so I made do with what I found…  Here you can see what they used, both yarn and colour, and you get some smashing pointers if you want to be a bit more extravagant.
You’ll also find, here, how you have to knit the scarf to make it correct… and my lord is it.. well, not complex… but… bothersome.. but the result is cool :3

I found this:

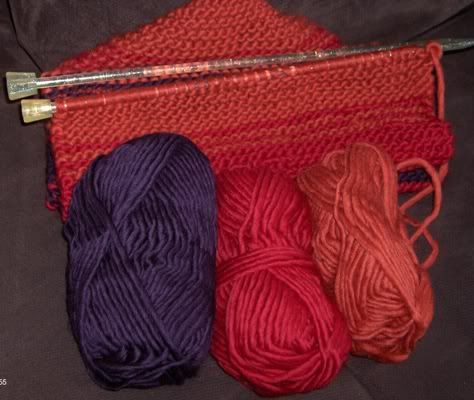
The yarn I’m using is called “easy” and it’s 100% Australian merino wool…The knitting needle is, according to the yarn band thingie, supposed to be 8-9… but I’m using a 7.. but the lady in the yarn store said it’d be fine… and she’s a pro, so I’m totally trusting her… AND I’ve seen how the knitting looks, and it looks gooood… XD

There are pictures, but seeing as my blog is being a douche right now, I’m going to post them later…

With the colour number etc…

Burgandy. Colour number 4219

Purple. Colour number 4855

Orange. Colour number 3619
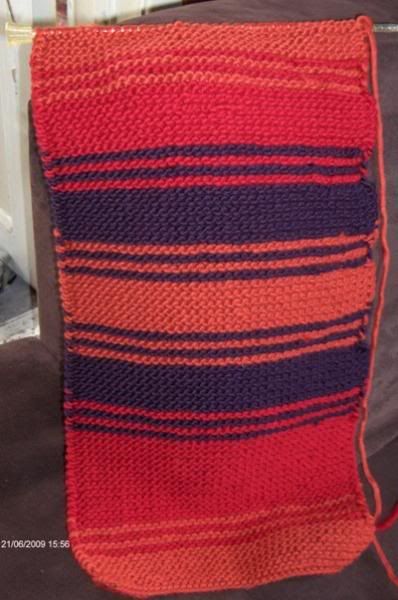
As you can see the last picture taken was on june 21st… and I had knitted some…

and HEY!!!! Finally I can add pictures again XD
Finally… And it means I can picture update what I’ve done…
Gosh, I wish I had been a good girl and taken pictuers…. oh well…

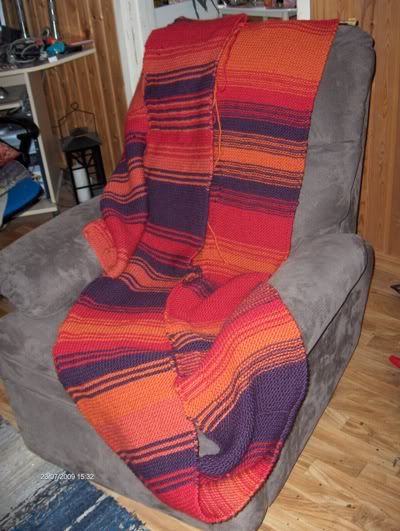
I just took this picture… so this is about a months work… Not diligently working my fingers to the bone a months work, but a few hours here and a few hours there.
If you look closely you can see the horrors of not getting all your yarn in one go, but even if you do get it all in one go, you might still get colour differences. There are patches of slightly darker orange, but I seriously didn’t notise it till I was well past it (darkly lit room) and I couldn’t be bothered to rip it all up to change it. I’ve already had to rip up some of my work. I knitted the wrong colour, which can happen… but it was only that one time, and I am NOT planning on doing that again…
I’ve only got a few days work left now.. I’ll take a picture again when I’m all done… well… with the knitting itself… and again when I’ve attached the tassles.

Update will be heading this way…

Lene

Update:
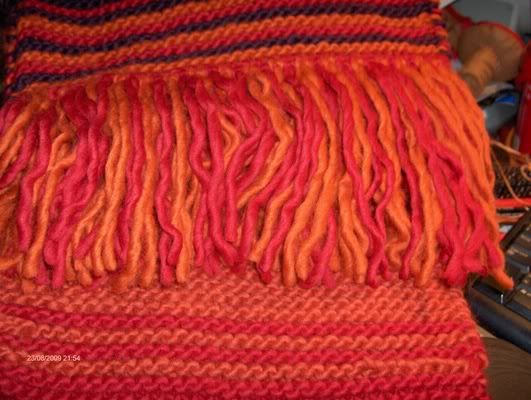
It’s quite a while since I finished the scarf itself. It’s looking very nice. And I’ve spent weeks not bothring to put the tassles on because someone was making fun of it… *scowls*
But since I have good friend who back me and my rediculous ideas up, I finally tassled up the scarf last night.

I first started with them like 4 inches long… and tied them quite tight/close together… but the I read somewhere that they was supposed to be 12 inches long, so I undid everything I had done… and when I had started to make the 12 inch long tasslets, I found out that the 4 inch ones was right after all… but I had already started with the 12 inch ones, and I thought they look better than the 4 inch ones… so this is it…
Tom Baker, I hope you like XD

Venus Fly Trap

Mood: Happy happy lovielovie
Listening to: *tap tap tap*

This is kinda a project, but still not…
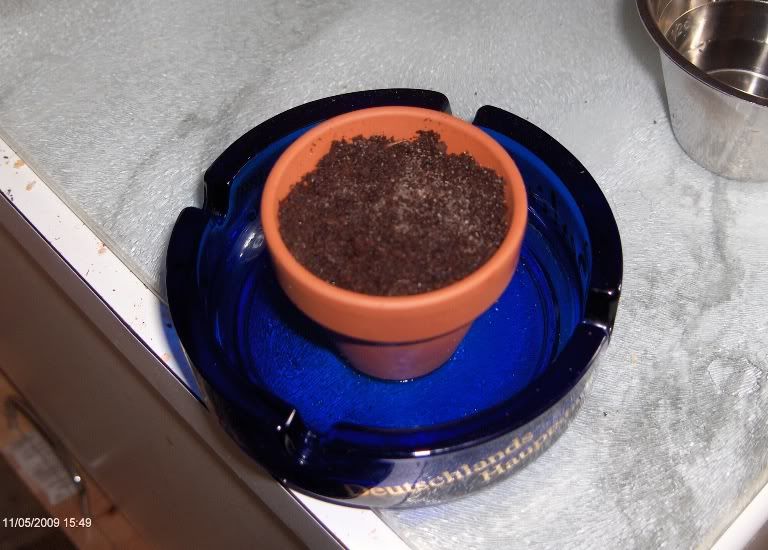
I finally got my Venus Fly Trap… but I have to grow it myself.. and there in lays the project bit…
If I can manage to keep my seeds and shit alive for 4-6 weeks.. I’ll get a Venus fly trap..
It really is adorable… it comes with its own pot… and a block of compost… add some water and poof, the thing swells up to triple the original size… very cool XD

There will be more pictures as it comes along… and those will be posted under this one… so it’ll be one continued “story” of how I manage to kill yet another plant… However.. I REALLY hope I manage to keep this one alive…
At least long enough to feed it at least ONE fly…

Update:
I didn’t even get it to bud. The thing died long ago…
I don’t know where I went wrong, but I know I did something… Would have been nice to make it grow…
But then I don’t have green thumbs… *sighs*

Lene does things she doesn’t know how to do part II

Mood: excited
Listening to: my inner music playing a triumphant “you go girl” melody

Hey!

Since before… way before christmas I made… or started to make… a pillow…
I got inspired by some iron-on pitured I found online and I later went to the store “Albertine’s Verden” and bought them.
I then went to a store near where I work, across the hall, to be exact, and got some fabric.
I went home and put it on a chair where it stood for… oodles of time…
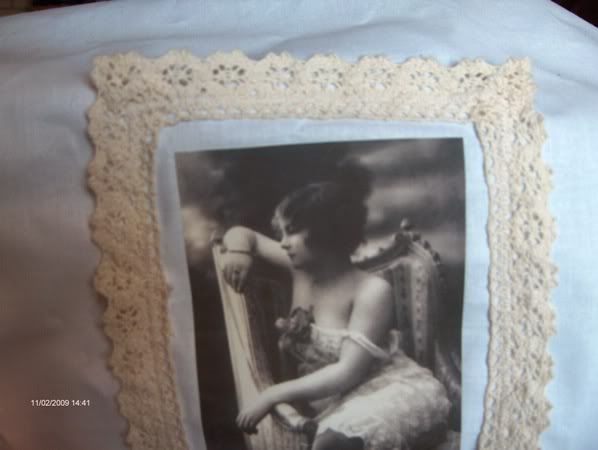
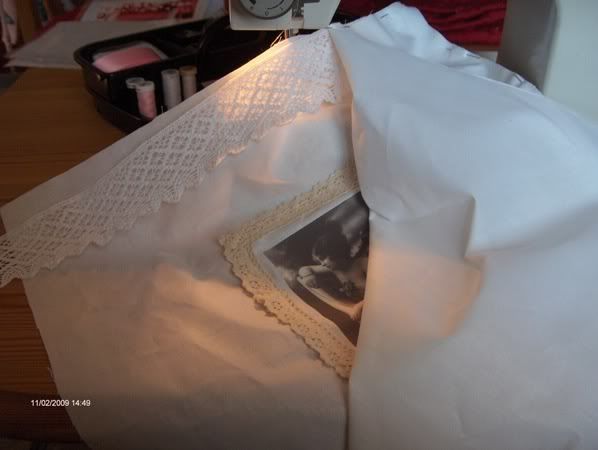
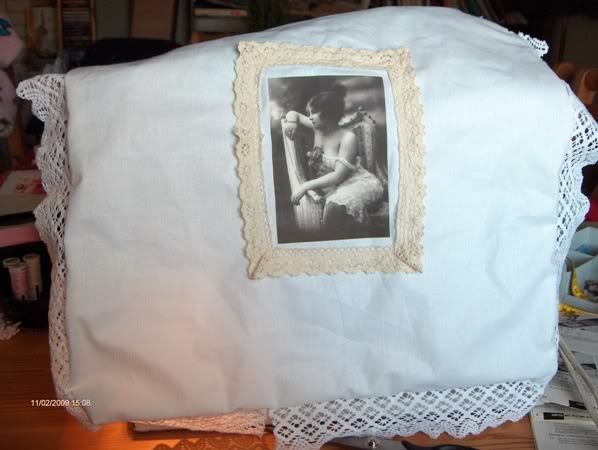
Then finally inspirtion caught up with me and I started doing stuff… I ironed on the print, after having cut the fabric to size, and added the first row of ruffles…

Imagine that with pins in it… that’s how it looked for about…. a very long time…
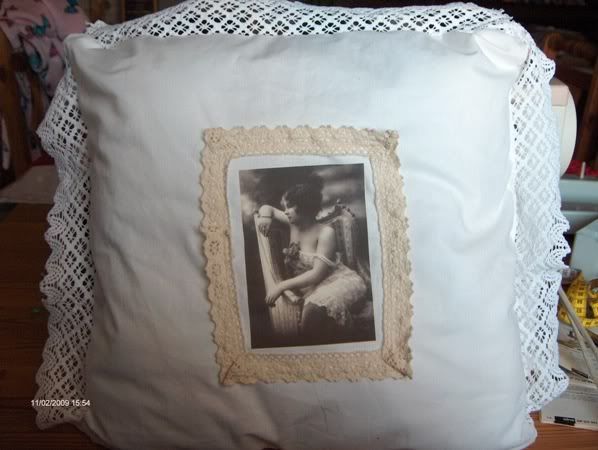
Then today I started doing stuff again… I sowed the thing and I think it looks pretty…
Then I had to add the second ruffle or whatever you’d call them, and… well… it wasn’t easy…

Seeeeee…. And I totally fucked up the corners…
I have no idea what I was thinking, really… bit it got messed up….

You can’t see my fuck-up here… so no matter…
Anyways… I finished… and

TADAAAAAAAA
I only fucked up on the corners…
But other than that I think it looks nice….

Lene

Lene attempts to do things she doesn’t know how to do….

Mood: Good
Listening to: Queen – We will rock you… some sports event thingie on tv… just glad I’m not watching it…

Yes, my fingers have started itching. I’ve wanted to do something for ages…
I started out making a pillow, but I didn’t get very far… I cut out the squares, ironed the picture onto it and added some lace… that’s about it, really…
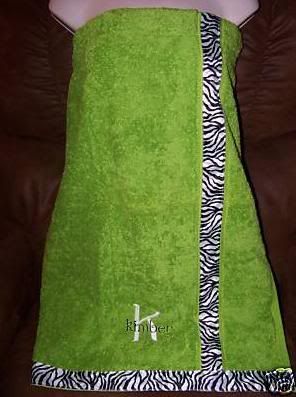
But now I want to make something else…  A spa towel wrap…

….
It’s cool…. No… really… it is…. and I want one….
This one is avalable on eBay, just so you know it… just write in Spa Towel Wrap, and you’ll see this one or one in yellow.. they are equelly nice…
So yes… I’m making one… but not in green… mine won’t look like that… I found the fabric..
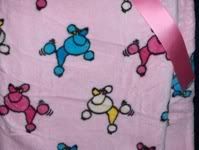
It’s fleece… with soft soft lovie lovie insides…

I think it’s adorable… AND I have pink ribbon.. <3
It’s all love, I tells you!!!

And to be honest… I don’t even know where to start D:
But I really should, because I’m really looking forward to it’s soft soft lovie lovie niceness…

I’ll keep you posted on my progress…

Lene

UPDATE!!!

It’s been a few days now… and I finally got off my ass and started…
First I ripped up the seams.. which took ages… but I had too.. seeing as the thing is a blanket and I needed a larger fold to house the elastic band… then I started sowing… and I finally figured out how to zig-zag XD … both very close zig-zags and spaces zig-zags…
When I was done I figured out that… I had fucked up…
I had sowed a hem on the bottom of the thing and I shouldn’t have.. not yet, anyway… I need to sow in some more fabric inbetween the doggies to make it wider… I’m a large woman, I need my space…
So yeah… I ripped up the stitches and that’s where I’m at now…

To be honest… I think it looks darn good…

I also know that I shouldn’t have sowed the sides together yet… I could have used that to sow the added pieces in… but let’s face it..
I’m not gonna win any awards for being the smartest person in the world… and right now I can’t be arsed to rip the stitchings up again…

More to follow…

UPDATE AGAIN!!!!

I’VE FINISHED!!!! XD
Yeah, I know… I’m surprised too…

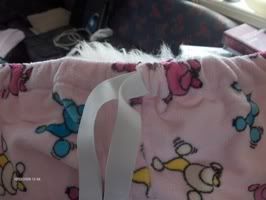
That’s how the elsastic band looked… before I zig-zag’ed them together and sowed the two ends up.

Here you can see the added bit I did… ok.. so it’s not perfect, but with the fabric I had left over, I couldn’t do what I was hoping to do, which was use the pink fabric in between and sow that together to make a larger piece…
But then I thought… hang on… I’m only gonna use it around the house… why should I make too much work for myself over something only my boyfriend’ll see… and myself, of course… so I cut and stitched… blind, I might add…
I was really lucky that the piece was large enough…

Here’s the close up of the added bit…
The piece is under my arm, so it’s not like it’s right where you’ll see it, anyway….

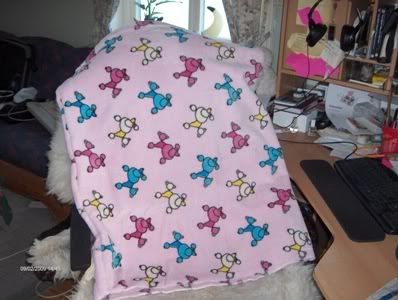
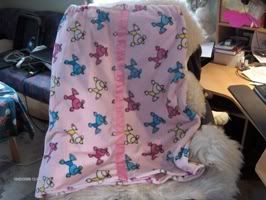
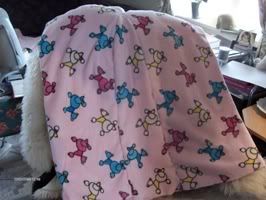
And this is the done product…
First thing I’ve finished something on my sowing mashine…
The pink satin ribbon wasn’t quite how I wanted it, but I realised after I had sowed closed the elsatic band opening that if I put the ribbon where I wanted it, from the very top to the bottom, then it would stitch through the elastic band, and I didn’t want that… and I don’t think I have enough pink ribbon to go around the bottom…. so for now I’ll have to make do with how it looks… and I’m pleased..
Well done, Lene… *pats self on back*

^_^